Android App with Local Nodes
This guide explains how to run the full Interstellar stack locally using Docker or Podman. You will be able to launch the Substrate node, Integritee TEE worker, and IPFS service, then interact with the system using the Interstellar Android demo app.
This setup enables full offline testing without relying on a hosted VPS.
This milestone delivers the core transaction signing capabilities of the Interstellar platform for multiple blockchains coins: DOT, ETH, BTC, SOL.
All features have been extensively tested with a focus on user experience, demonstrating how simple, reliable, and intuitive these flows can be. The current interface has been adjusted to support efficient testing, while leaving room for further UX and UI refinements in the production-grade SDK.
Although the system is not yet production-ready, it provides a robust foundation. Broader edge case coverage, interoperability, and resilience guarantees will be the focus of the upcoming SDK and future milestones. Reviewers are encouraged to focus on the functional flow and experience of the key features in this milestone.
This compatibility note applies to the backend stack, tested on Ubuntu 24.04 LTS (x86_64) using Docker (docker-compose) or Podman (with manually installed podman-compose*).
The stack is expected to work on other recent Linux distributions, but this has not been officially verified.
Known issue: May fail on Apple Silicon (M1/M2/M3/M4) - due to current SIMD usage and QEMU/Rosetta limitations - crash on M1/M2 (not tested on M3/M4)
The frontend (e.g., Android emulator or physical device) can run on any OS supported by Android Studio (expect some emulator limitations on Apple Silicon)
*Compose tools are required to manage service startup dependencies (e.g., health checks).
1. Prerequisites
| Requirement | Install Guide |
|---|---|
| Docker | Install Docker |
| Docker Compose | Install docker-compose |
curl, wget, jq | Installed via apt/brew or default in most environments |
| Android Studio | Install Android Studio |
ADB (adb reverse) | Comes with Android Studio |
You may also use Podman as an alternative to Docker.
2. Launch the Interstellar Stack Install
The BTC worker connects to a Bitcoin Testnet RPC endpoint using a hosted provider.
For simplicity, we provide curators with a ready-to-use .env file.
Place the file in the same directory as docker-compose.yml.
It contains a single variable:
BITCOIN_TESTNET_API_KEY=<API_KEY_WE_SEND>
⚠️ If you prefer to use your own provider, simply replace the value of BITCOIN_TESTNET_API_KEY in .env.
# Step 1: Create a working directory
mkdir interstellar_m2_demo && cd interstellar_m2_demo

# Step 2: Download the stack config
curl -L -o docker-compose.yml https://raw.githubusercontent.com/Interstellar-Network/containers/refs/tags/testnet-m2/docker-compose.yml
curl -L -o docker-ipfs-init.sh https://raw.githubusercontent.com/Interstellar-Network/containers/refs/tags/testnet-m2/docker-ipfs-init.sh
chmod +x docker-ipfs-init.sh
# Step 3: Place the .env file we send in this directory
# Step 3: Start Docker (if needed)
sudo service docker start  # (for most Linux distros)

# Step 4: Launch the stack
sudo docker compose down --timeout 1 && sudo docker compose up --force-recreate
⏳ Waiting for Master Circuit Generation
Once the node and service are running, the system will automatically trigger the generation of master circuits from the hardware description files.
These circuits are compiled using the Verilog logic generated from the original master circuits specifications, processed through the logic synthesis pipeline. This step may take several minutes depending on the environment.
During this time, monitor the logs and wait for the following sequence of messages:
[ocw-circuits] callback_new_skcd_signed sent number : <number> 1-Success  - 0-Fail
[ocw-circuits] callback_new_display_circuits_package_signed: (<CID_1>, <message_digits_number>), (<CID_2>, <pinpad_digits_number>) for <account_id>
Shortly before these messages, you will also see large blob uploads to IPFS such as:
Requested started id=<...> method=POST uri=http://ipfs:5001/api/v0/add
These blobs correspond to the master visual circuits (SKCD display circuits), which are the result of the hardware synthesis pipeline. Their appearance in the logs is a strong indicator that the build process has completed.
ℹ️ You can identify this moment easily by spotting two large IPFS file hashes being logged together — one for the secure keypad circuit and one for the display message circuit i.e one time code These hashes will later be used for visual challenge rendering and validation.
Detailed example from integritee_node-1
Requested started id=1059 method=POST uri=http://ipfs:5001/api/v0/add
[fetch_from_remote_grpc_web] content_type: application/json
[ocw-circuits] callback_new_skcd_signed sent number : 1
[ocw-circuits] callback_new_display_circuits_package_signed: ("QmUx8mMo8GgGdUhcgFQVg2sexkVfyq1sViruZiBadUfs4d",2),("QmcwXyZNmLXnjeoA25YSzj41G1sr6ZsHgZZBQVWvcfe1qn",10) for d43593c715fdd31c61141abd04a99fd6822c8558854ccde39a5684e7a56da27d (5GrwvaEF...)
[ocw-circuits] Hello from pallet-ocw-circuits.
🛌 Idle (0 peers), best: #6 (...), finalized #3 (...), ⬇ 0 ⬆ 0
You can also verify the runtime is ready using Polkadot.js
While waiting for the stack to fully initialize, you can explore the architecture and rationale behind
the VCA System Layer. This layer is responsible for producing the VCA Token,
the core cryptographic artifact used by the Trusted Action Validation Protocol (TAVP).
The token is generated through a hardware-secure pipeline starting from VHDL logic descriptions, synthesized into
Verilog and compiled using theYosis and abc logic synthesis toolchain. The resulting master circuits define both the secure display and interaction logic — including the Secure Circuit Descriptor (scd) and its runtime variant, skcd, used for verifiable evaluation.
Once built, these circuits are uploaded to IPFS and used to enable real-time, privacy-preserving visual cryptographic challenges, ensuring each critical user interaction is verifiable and resistant to malware, phishing, and adversarial AI.
3. Install the Android Demo App
Download the APK
From the official Interstellar GitHub Release (specific APKs preconfigured to connect to localhost):
androidApp-arm64-release.apk— for Android devices and Apple Silicon(M1/M2/M3/M4)androidApp-x86_64-release.apk— for Android emulators running on x86_64 platforms (e.g., Windows PCs, Intel-based Mac)
While the app runs on Apple Silicon (M1–M4), emulator performance may vary due to ARM virtualization and GPU constraints. For accurate testing—especially for Rust-based rendering and cryptographic logic—choose the best available setup:
| Recommended Option | Notes |
|---|---|
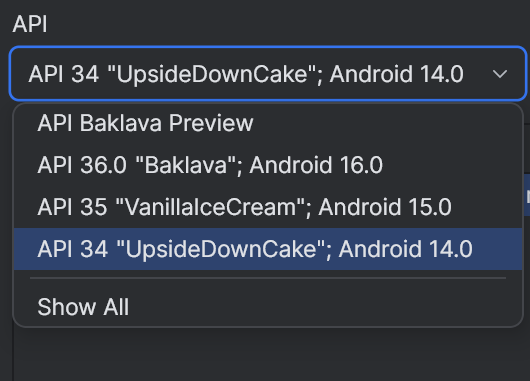
| Mid-to-high-end ARM device | Preferred. e.g., Pixel 5–Pixel 8. Avoid Android 16 (API 36) for now. |
| x86_64 emulator (Intel) | Reliable with mid-range or better GPU. |
| Apple Silicon (M3/M4) emulator | Acceptable if GPU is sufficient. Better than M1/M2 for rendering. |
| Apple Silicon (M1/M2) emulator | Works, but may show degraded performance or rendering issues. |
Option 1: Physical Device
- Transfer the APK to your phone or download it directly from the device
- Allow app installation from external sources
- Install the APK
- Connect your devices to Android Studio
Ensure that your device is configured for english language
Option 2: Emulator
- Create a
Pixel 7or equivalent emulatorAPI 31+-API 35 - Edit the emulator and select an API 31+ below the default API 36 (API 34 more stable)
- Launch the emulator
- Drag and drop the APK onto the emulator window to install
Our app currently crashes on Android API 36. The issue is not caused by the new 16KB memory page model, as it runs correctly on API 35 with 16KB pages. API 36 is a very recent release and may introduce subtle runtime or platform-level changes that affect low-level Rust code (e.g., garbled circuit evaluator or frame renderer). Until further investigation, we recommend using API 34 (more stable on emulator) or earlier for testing.
On Apple Silicon (M1–M4), emulators may fail to render or execute low-level native code correctly unless software rendering is enabled.
To enable it:
Device Manager → Edit → Advanced Settings → Emulated Performance → Graphics → Software
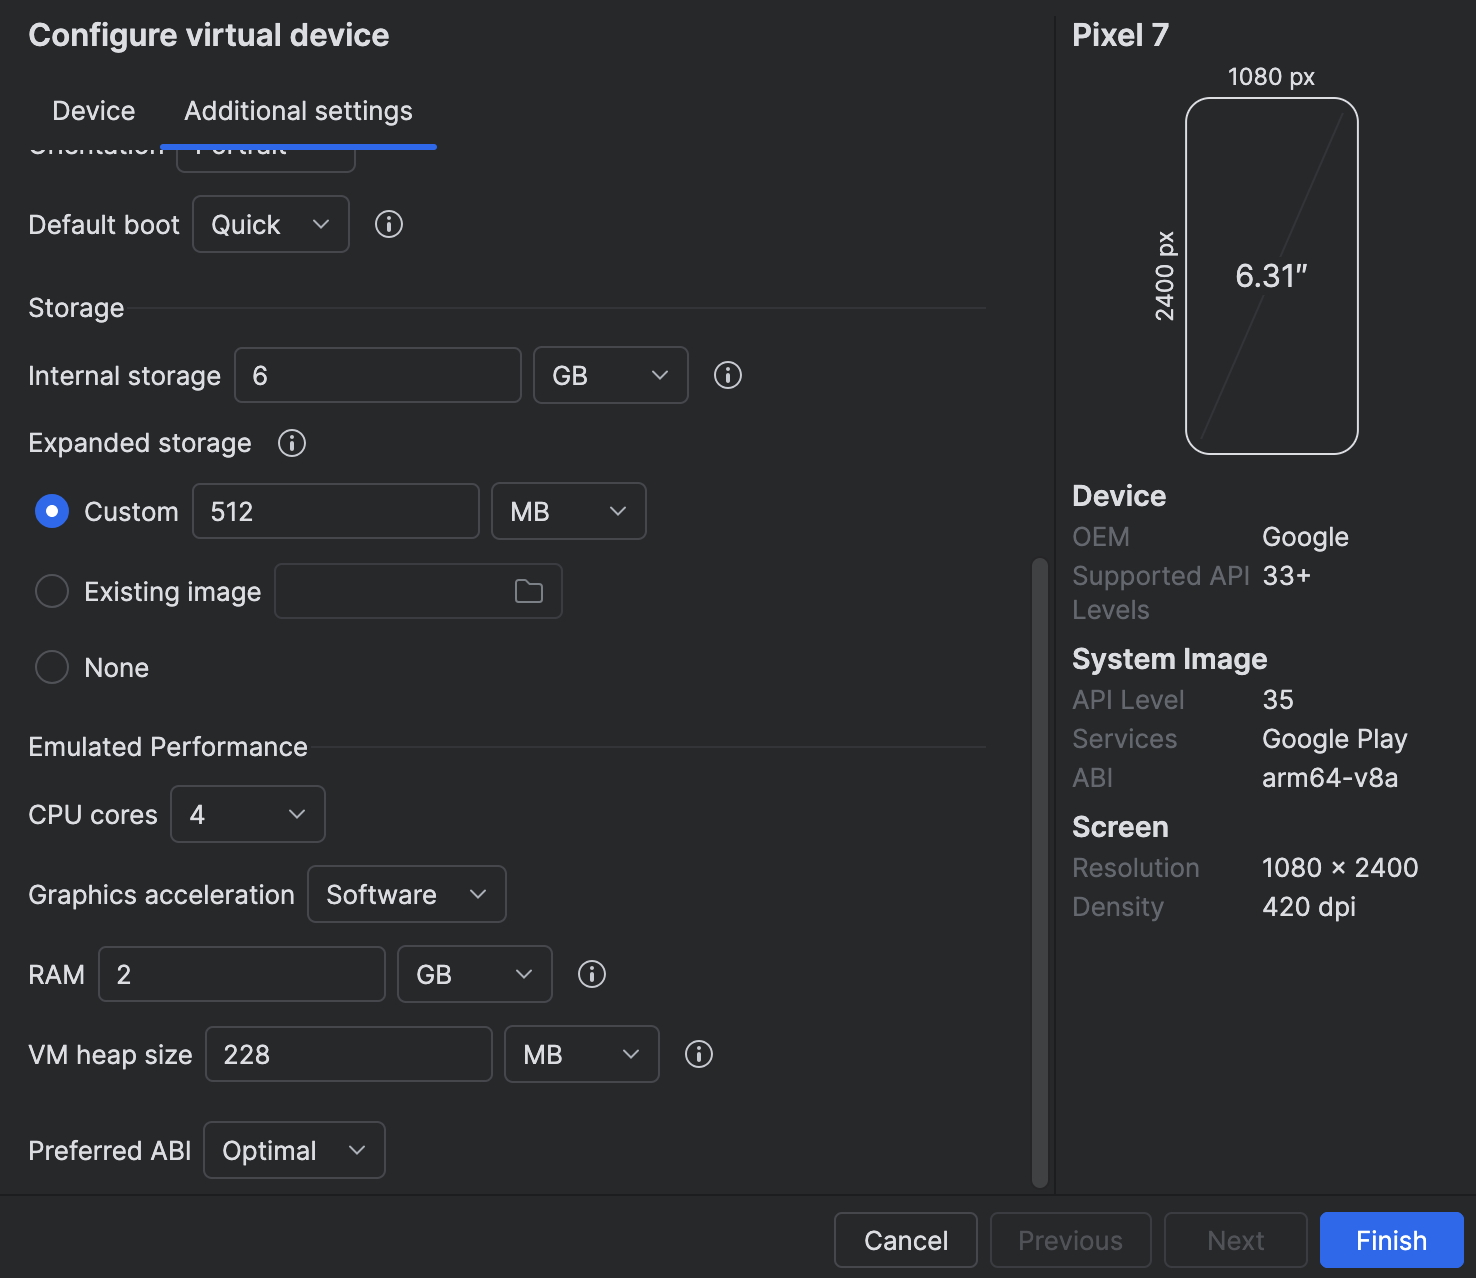
- Mandatory for M1/M2: hardware acceleration is not supported and cause crashes.
- Not tested on M3/M4: may support hardware acceleration, but software mode is safer for compatibility.
Enabling this setting ensures more reliable emulator behavior, especially for native Rust or cryptographic rendering, at the cost of some performance.
2. Link App to your local Interstellar stack:
The Android app is preconfigured to connect to localhost
To allow the Android app to connect to your local blockchain and IPFS stack:
Step 1: adb reverse Setup
On the Desktop connected to the Device or running the Emulator (Windows, Mac OS, Linux)
If Android Studio is already installed, you can enable adb in your terminal by adding it to your PATH with the following command (adjust the path if needed):
Add adb PATH:
Linux:
export PATH=$PATH:$HOME/Android/Sdk/platform-tools
Mac OS:
export PATH="$HOME/Library/Android/sdk/platform-tools:$PATH"
Windows powershell:
$env:Path += ";$env:LOCALAPPDATA\Android\Sdk\platform-tools"
adb reverse tcp:9944 tcp:9944   # Substrate WS
adb reverse tcp:2090 tcp:2090   # Integritee node port
adb reverse tcp:5001 tcp:5001   # IPFS
Make sure adb is properly configured and the emulator or device is detected
with adb devices
You can also check the reverse setup with adb reverse --list
This works for both emulators and real devices connected via USB
Step 2 (optional): ssh Port Forwarding
On the System or VM running the Blockchain stack (WSL2, Remote VM)
If the emulator is running (or the device is connected) on a different network interface than the backend (e.g., the backend runs in WSL2 and the Android emulator or device is connected via USB to Windows), you may need to configure port forwarding between the desktop and the blockchain.
WSL2 -> Windows example:
export WSL_HOST_IP=$(ip route | awk '/default/ {print $3}')
ssh -N -R 9944:localhost:9944 -R 5001:localhost:5001 -R 2090:localhost:2090 [windows_user_name]@$WSL_HOST_IP
To avoid issues with ssh or adb reverse during this local test, you can temporarily disable the Firewall:
Example on Windows with PowerShell (as Administrator):
Set-NetFirewallProfile -Profile Domain,Private,Public -Enabled False
You can re-enable it later with:
Set-NetFirewallProfile -Profile Domain,Private,Public -Enabled True
During Milestone 2, our primary objective is to validate the backend capabilities required to generate, sign, and execute transactions across different chains.
At this stage, the focus is on ensuring correctness and robustness of the transaction pipeline at the infrastructure level. User-facing aspects such as application UI/UX, visual polish, or cosmetic design are not yet part of the milestone scope. Especially because our focus is the delivery of a mobile SDK.
In addition, while the backend successfully submits transactions, we have not yet integrated state tracking from the backend (e.g., monitoring transaction inclusion and confirmation events). This will be addressed in subsequent milestones, once the foundational backend logic is fully validated.
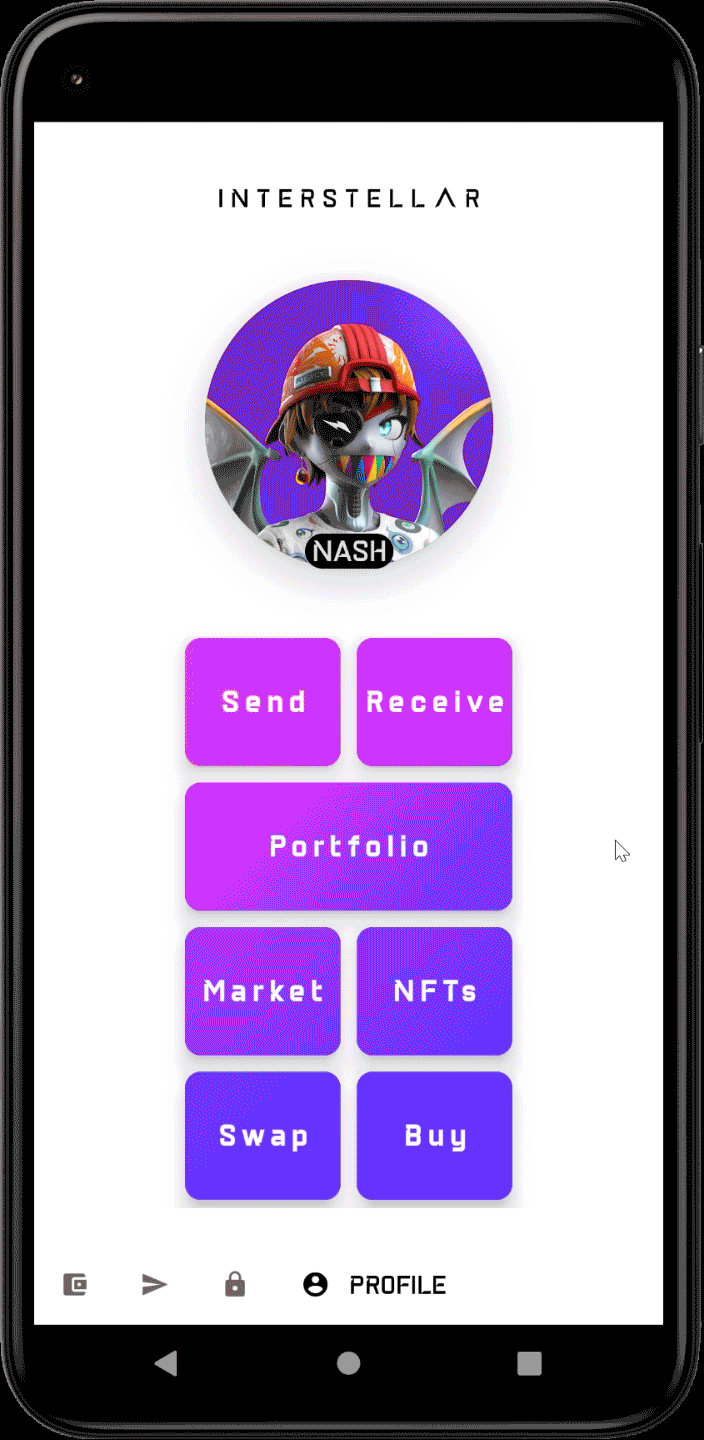
4. Run the Android App Demo
Step 1: Connect & Onboard
- Launch the app
- Register a new mobile account
- Validate biometric & SE-based registration
- Check toasted messages
- Registering
- Registered
Step 2: Fund your wallet
following is suggested faucets for DOT/PAS, SOL, ETH, BTC:
Then on your portfolio screen:
- Simply click on the correponding DOT, SOL, ETH, BTC symbol to see your address.
- Click on
Create Pairif needed and then on the address to copy it, then paste it in the corresponding faucet.
BTC transaction from the faucet usually can take up to one hour.
Feel free to contact us, we will send you SOL or BTC for their respective testnet.
Once Portfolio funded you are ready to move on the Send Screen:
Wipe down on the portfolio or balance/address screen triggers a manual refresh of balances. This is a temporary workaround until the app natively tracks chain states more accurately, which will be available with the SDK delivery.
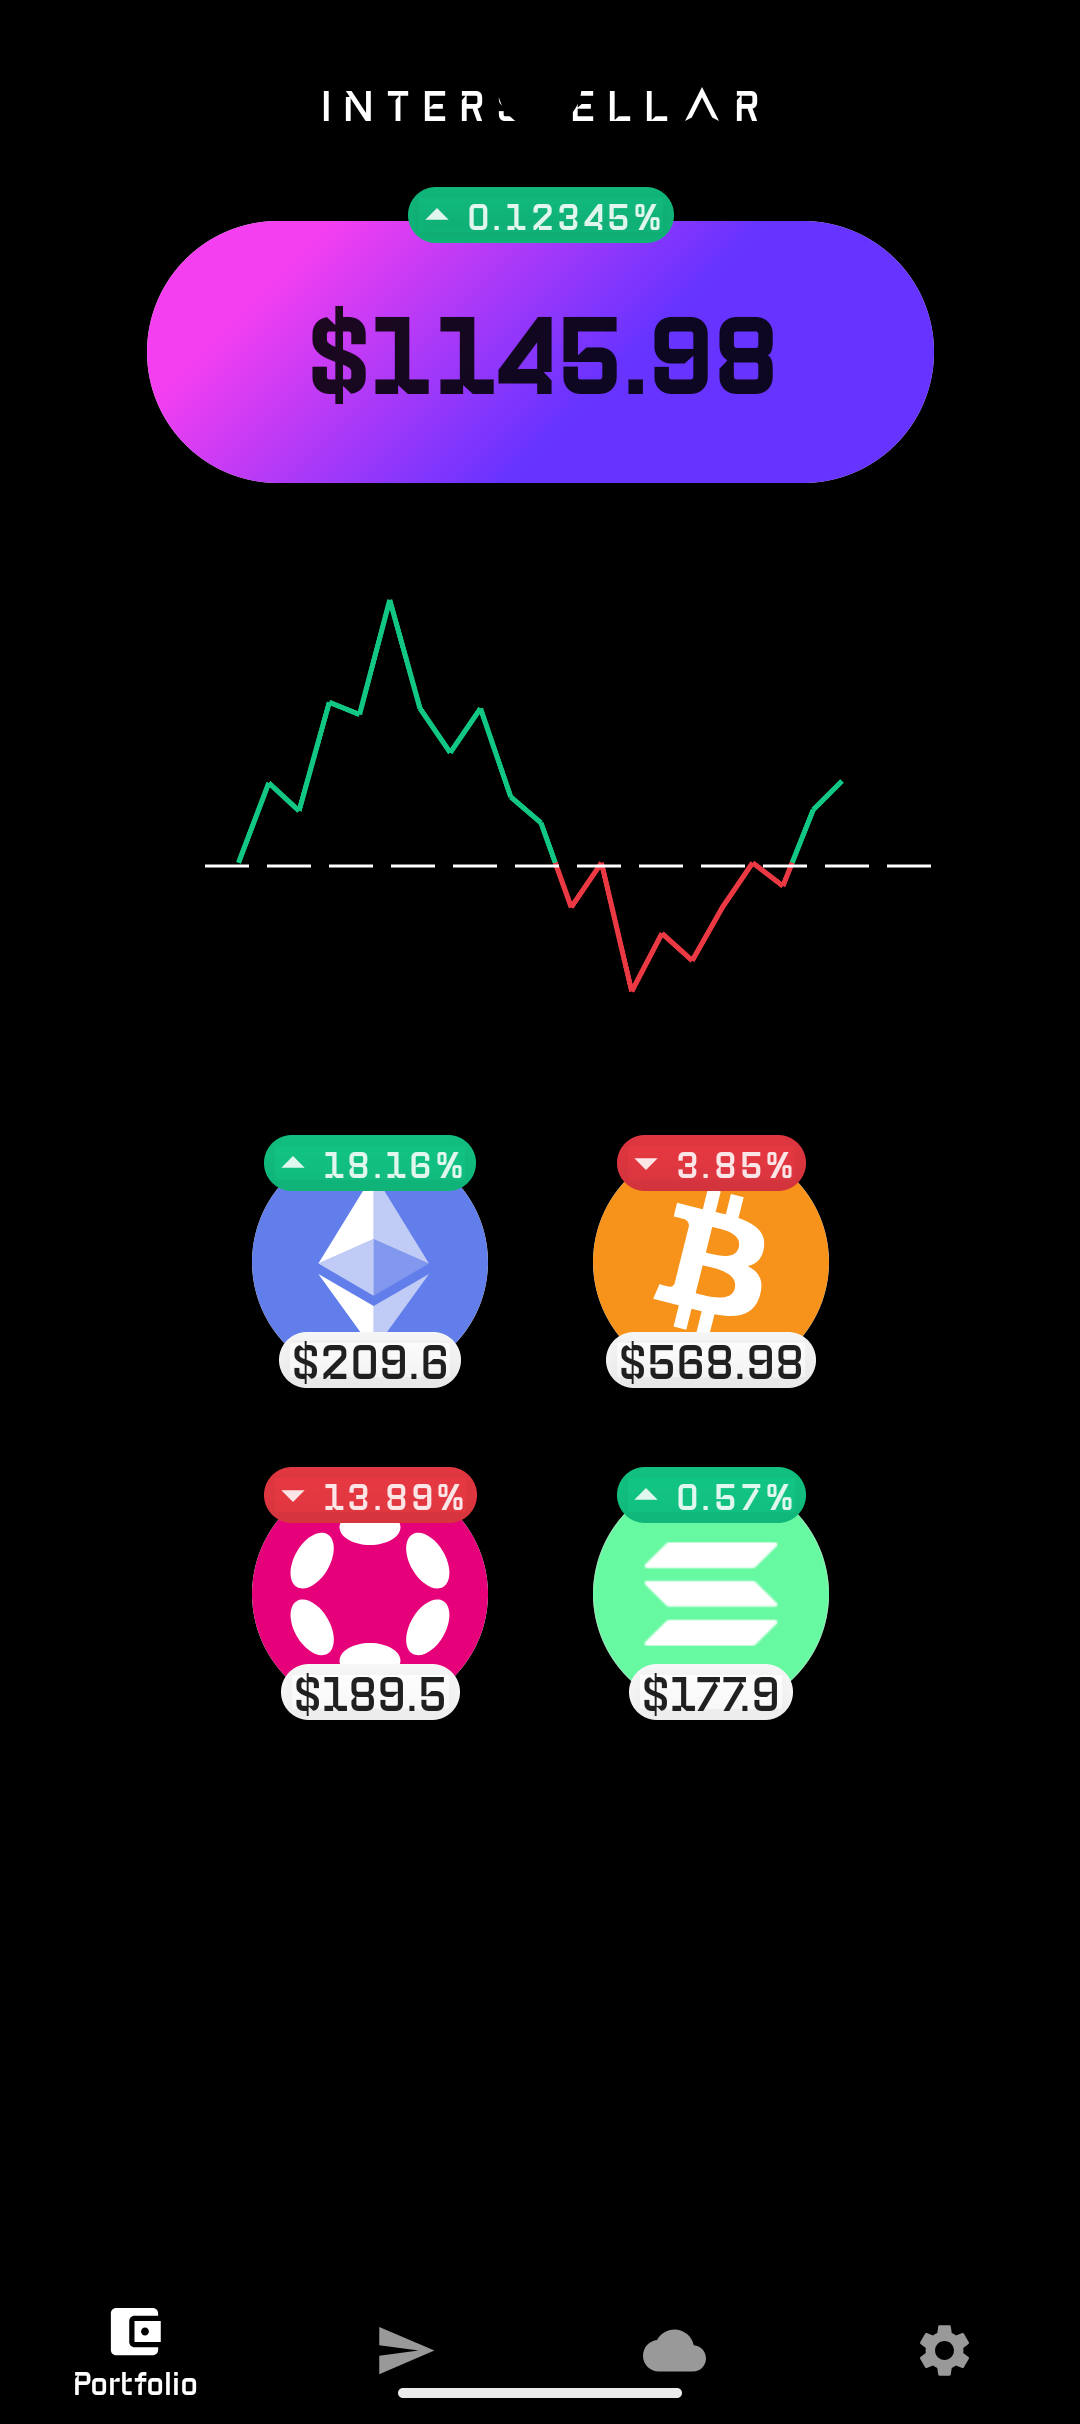
For testing purposes, the account/address and transaction validation screens display balances and transfer amounts in the atomic units of each chain:
- DOT / Paseo: planck
- BTC: satoshi (sat)
- ETH: gwei
- SOL: lamports
This approach ensures precision and consistency during backend validation, even if these units are less user-friendly than standard denominations.
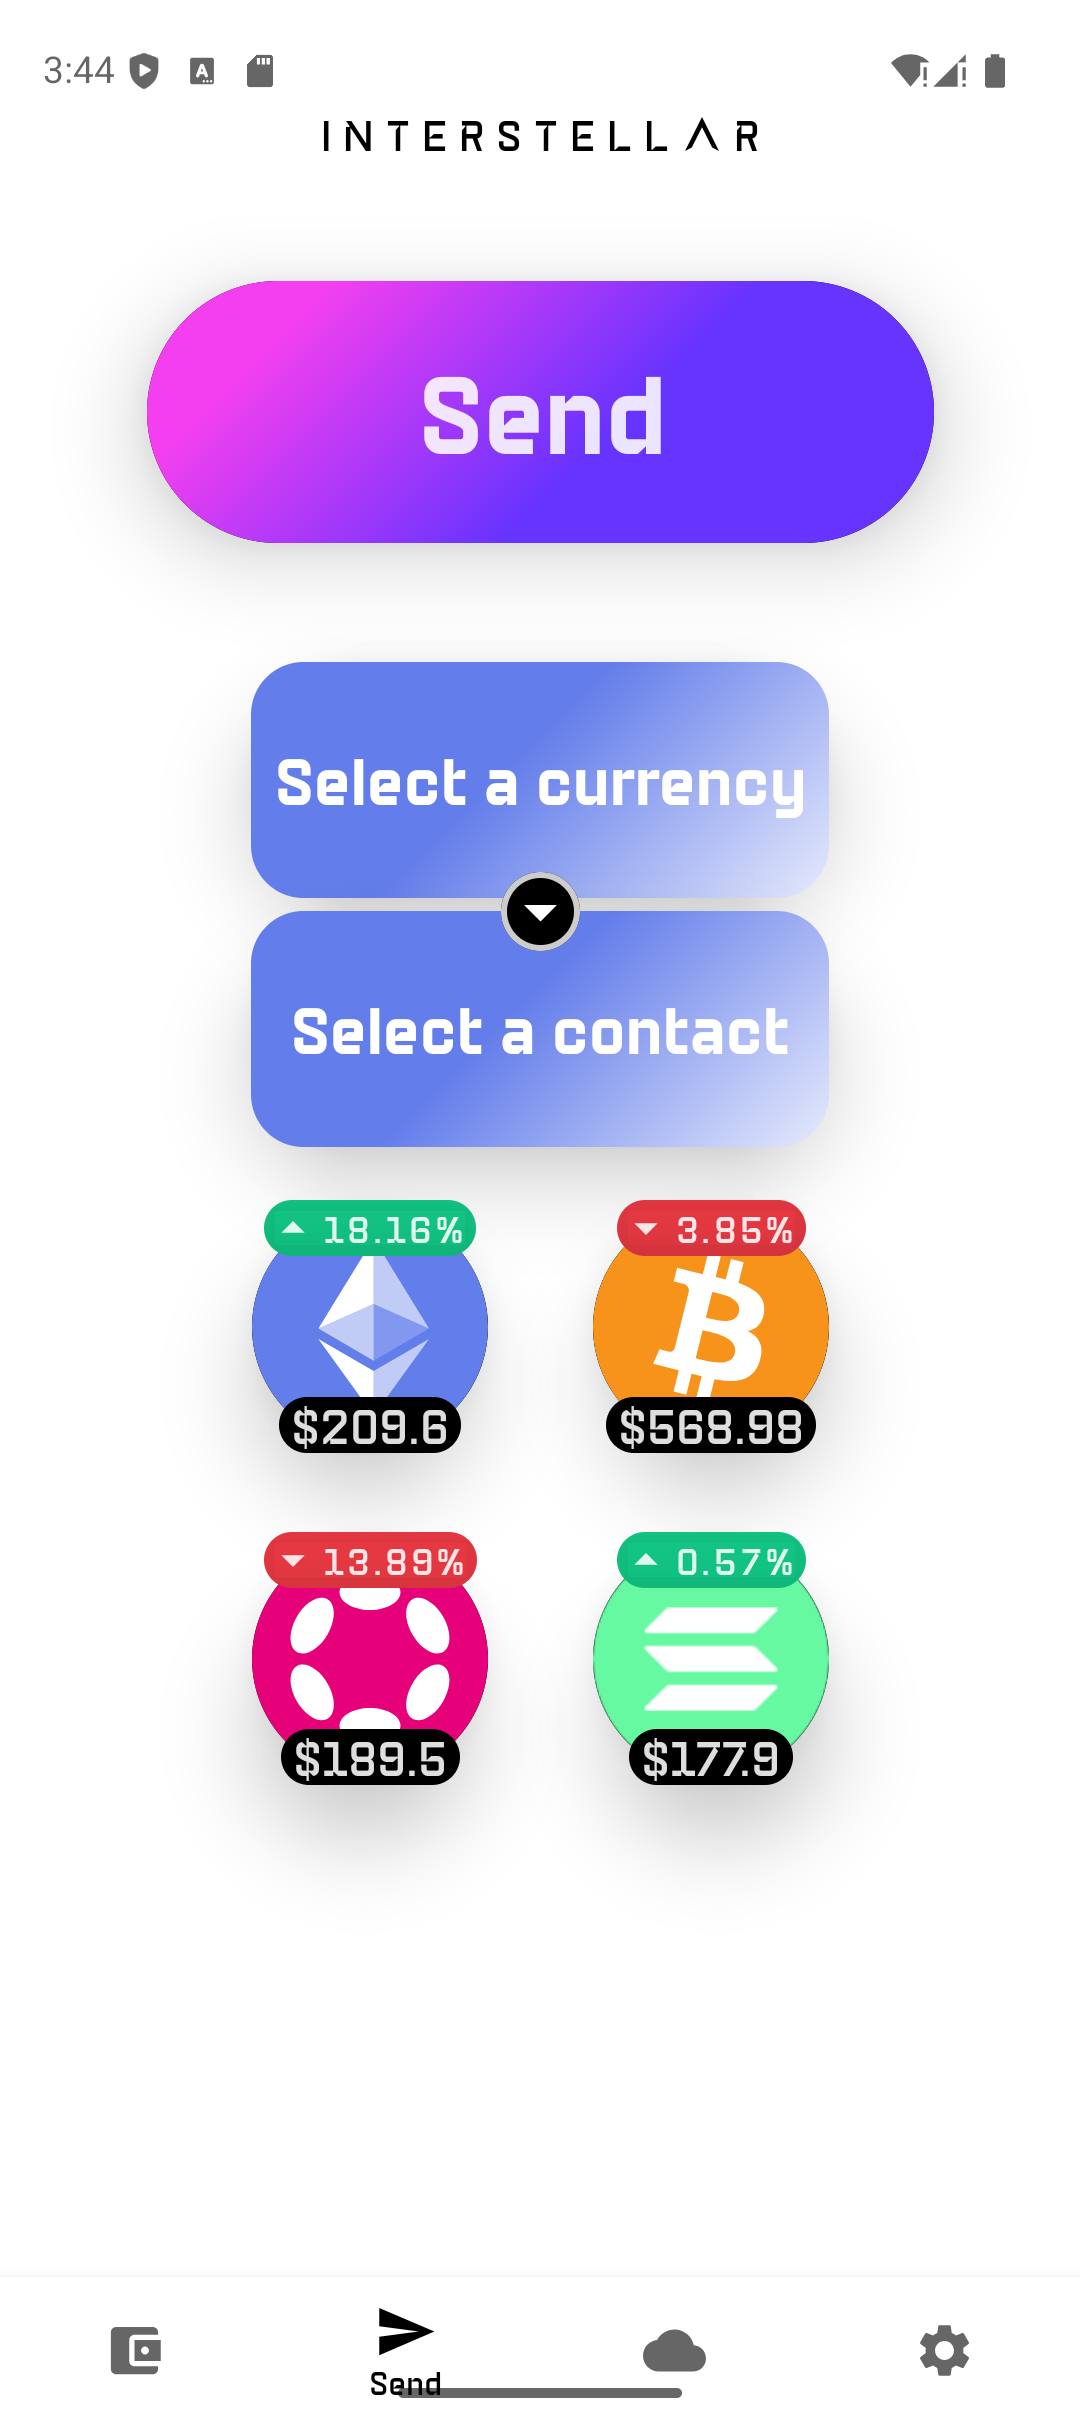
Step 2: Test Transactions
For simplicity during Milestone 2 testing — and to minimize the need for testnet tokens — the sender and receiver addresses are set to the same account, except for Solana (which uses a predefined address). This setup accelerates testing for curators by avoiding manual address inputs, while still allowing us to validate transaction generation and submission without requiring external token funding.
- Send DOTs, SOLs, ETHs, BTCs to a contact
- Trigger the Trusted Action Validation Protocol (TAVP) screen
- Enter the one-time code (2-digit), or experiment with trial/feedback
- Check toasted messages whith Action Validation Screen:
- Initializing a transaction...
- [error] No circuits available after 10s; Something went wrong! (usually due to insuficient balance)
- [after taping one-time code digits]
- Validating transaction...
In Milestone 3, transaction validation will become conditional on an amount threshold. This threshold will be managed by the Transaction Management Layer (TML), allowing policies such as requiring validation only for transfers above a specified value.
📖 How to Track a Transaction
Copy the transaction hash (or signature) printed in the backend logs when a transaction is submitted.
- DOT/Paseo → extrinsic hash (hexadecimal, 0x…)
- ETH → starts with 0x…
- SOL → long base58 signature string
- BTC → transaction ID (txid, hexadecimal …)
Paste this value into the corresponding block explorer (alternatively you can also paste your address):
- Polkadot / Paseo (DOT): Subscan
- Ethereum (ETH): Etherscan
- Solana (SOL): Solscan
- Bitcoin (BTC): Mempool.space
The explorer will display transaction status, inclusion block, and fee information.
🔎 Example Log Lines Containing Transaction Hashes
Here are the log patterns to look for in each chain’s backend output:
DOT
[2025-08-27T15:26:52Z DEBUG pallet_dot_client::pallet] [submit_extrinsic] RPC response: Object {"result": "0x1e58d3a0a3fdf08440a683b67248819a6a64c8249b486b3aae9a686e7ec8de3d"}
ETH
2025-08-27T17:47:51.688957000Z [INFO pallet_eth_client::pallet] send_transaction: OK: 0x6593fb0b75fb4eae41e6d918f1ab99dd011f4b1e95c6d913b607968d7f6a0471
SOL
2025-08-27T18:38:52.145987000Z [INFO pallet_sol_client::pallet] [send_transaction] Transaction sent with signature: 3QuGubLdzpSi6M3Xy2VxW5ZNJZPnxwy8MfRfvKurDA3MyNYMvgKFVPXt16xzDiHbbn4Px6hfYiq6t7haA6MdbdAb
BTC
[INFO pallet_btc_client::pallet] send_transaction: OK: txid=60e95abf0d674143fae1ef11f115386a6dadcb4438ee0ab5c1a4e26438844878
When a transaction is attempted without enough funds to cover the transfer amount and network fees, the client aborts before submission.
All chain clients (DOT, ETH, SOL, BTC) follow the same pattern: the initialize_transaction step fails, and the error is returned in the logs. For example, in the SOL client:
[ERROR itp_stf_executor::executor] Stf execute failed: Dispatch("SolClient Initialize Transaction error: ... message: Some(\"InsufficientBalance\") })
At this stage of the app/SDK devellopement, if an insufficient balance error occurs, the VCA token is not transfered to the app, and the screen instead displays a generic “Something went wrong!” message.
This behavior ensures no invalid transactions are broadcast and provides a clear error message for debugging and verification.
If you are using an emulator with low-end GPU, or a low-end or outdated Android device with limited GPU, the user experience may be significantly degraded. Although the validation screen may be harder to read in such conditions, you should still be able to complete the test process.
In the future, we plan to introduce a trusted beneficiary feature. This will enable users to register known recipient addresses on-chain through a secure validation process, preventing attackers from substituting contact names with malicious public keys. This enhancement will make the wallet both more secure and user-friendly.
🛠️ You can check the logs from your local stack to see whtat happen begind the hood when you interact with the blockchain:
extrinsicssent
Interpreting Logs
When interacting with the mobile app (e.g., authentication, transaction validation, recovery),
key log messages are printed by both integritee-node and integritee-service.
Trusted Action Validation Highlight
These logs help verify that Trusted Action Validation flows used both in transaction validation and recovery are working as expected.
Key messages to look for:
Challenge screen rendering (garbled circuit evaluation):
[tx-validation] store_metadata_aux: message_digits = [9, 7], pinpad_digits = [8, 4, 6, 7, 3, 1, 5, 2, 9, 0]
Succesfull or Failed Validations (timing or incorrect code touchscreens positions)
- If you enter an invalid code:
[tx-validation] TxFail - If correct:
[tx-validation] TxPass
🛠️ Mobile Registration
This log trace shows what happens when a new device connects to the system and is not yet registered under a root account. The backend detects the missing account and proceeds with registration:
[INFO  pallet_mobile_registry::pallet] ensure_has_root_account failed for  while checking if registered: Module(ModuleError { index: 16, error: [0, 0, 0, 0], message: Some("RootAccountNotFound") })
[DEBUG pallet_mobile_registry::pallet] register_mobile start for
[DEBUG pallet_mobile_registry::pallet] register_mobile: new registration for
[DEBUG pallet_mobile_registry::pallet] register_mobile end
✅ What to Look For
RootAccountNotFound: expected on first connection from a new mobile identity.register_mobile start→register_mobile end: confirms that registration was initiated and completed.- These logs confirm that the system automatically falls back to registering the mobile when not yet linked to a root account.
Learn more on Account Abstraction Layer
Learn more on Authentication Layer
computed_inputs_from_permuation detailed
🛠️ DOT / PASEO Transaction
This section explains how to read a TAVP-gated DOT/PASEO transfer executed via the Interstellar DOT client on Asset Hub (Paseo).
Trusted Action Validation — Commitment
TAVP commitment logs
[2025-08-27T15:26:42Z INFO  pallet_tx_validation::pallet] [tx-validation] store_metadata_aux: who = , message_pgarbled_cid = "QmZHKMEKiWq5dbmxP7nWRJ2dPQvc1bY8YfbiZSQGVhfj8e", message_digits = [0, 4], pinpad_digits = [2, 9, 0, 4, 3, 7, 5, 1, 8, 6]
[2025-08-27T15:26:42Z INFO  pallet_tx_validation::pallet] [tx-validation] store_metadata_aux: done!
[2025-08-27T15:26:42Z INFO  pallet_key_manager::pallet] [DOT-client]-[key-manager]- Commitment prepared and stored: cid="QmZHKMEKiWq5dbmxP7nWRJ2dPQvc1bY8YfbiZSQGVhfj8e"
[2025-08-27T15:26:42Z INFO  pallet_key_manager::pallet] [DOT-client]-[key-manager]- Commitment prepared and stored: digits=BoundedVec([0, 4], 4)
[2025-08-27T15:26:42Z INFO  pallet_key_manager::pallet] [DOT] client-[key-manager]- Commitment prepared and stored: pinpad_digits=BoundedVec([2, 9, 0, 4, 3, 7, 5, 1, 8, 6], 10)
✅ What to look for
store_metadata_auxshows a validmessage_pgarbled_cid(IPFS CID),message_digits, andpinpad_digits.- Key-manager confirms commitment stored (CID + digits + permutation).
❌ Red flags
- Missing CID or digits; commit not stored.
Trusted Action Validation — Input Check
TAVP validation logs
[2025-08-27T15:26:52Z INFO  pallet_tx_validation::pallet] [tx-validation] check_input: who = , ipfs_cid = "QmZHKMEKiWq5dbmxP7nWRJ2dPQvc1bY8YfbiZSQGVhfj8e", input_digits = [2, 3]
[2025-08-27T15:26:52Z INFO  pallet_tx_validation::pallet] [tx-validation] check_input: input_digits_str = "\u{2}\u{3}", input_digits_int = [2, 3], pinpad_permutation = BoundedVec([2, 9, 0, 4, 3, 7, 5, 1, 8, 6], 10)
[2025-08-27T15:26:52Z INFO  pallet_tx_validation::pallet] [tx-validation] check_input: computed_inputs_from_permutation = [0, 4], message_digits = BoundedVec([0, 4], 10)
[2025-08-27T15:26:52Z INFO  pallet_tx_validation::pallet] [tx-validation] TxPass
✅ What to look for
computed_inputs_from_permutationequalsmessage_digits.TxPassis present (challenge solved and authorized).
❌ Red flags
TxFail, or mismatch between computed and message digits.
Learn more on Authentication Layer
computed_inputs_from_permuation detailed
Chain Context (Header → Current Block)
chain context logs
[2025-08-27T15:26:52Z DEBUG pallet_dot_client::pallet] [get_current_block] Block number: 2596404
✅ What to look for
- Correct chain context (Asset Hub Paseo).
- Concrete current block number (used for era anchoring).
Balance Check (Sender)
balance check logs here
[2025-08-27T15:26:41Z INFO  pallet_dot_client::pallet] [get_account] Fetching account address for:
[2025-08-27T15:26:41Z DEBUG pallet_dot_client::pallet] [get_balance] Account info: <wasm:stripped>
[2025-08-27T15:26:41Z DEBUG pallet_dot_client::pallet] [submit_transaction] Sender Balance: 49990867380224, Required: 2001000000
✅ What to look for
- Sender’s free balance comfortably above required amount/fees.
- The line printing Sender Balance and the computed Required.
❌ Red flags
- Insufficient balance or missing account info.
Transaction UX Message (Optional)
transaction UX message logs
[2025-08-27T15:26:41Z DEBUG pallet_key_manager::pallet] [generate_tx_message] Generated message: Transfer 1000000 DOT to
✅ What to look for
- A human-readable message (useful for audit/UI), even if the unit label is a placeholder.
- Message aligns with the SCALE-encoded call that follows.
❌ Red flags
- Message missing crucial fields (destination/amount).
Call Construction (Balances.transfer_keep_alive)��
call construction logs
[2025-08-27T15:26:52Z DEBUG pallet_dot_client::pallet] [build_transfer_call] Call bytes: 0x0a030037d9896adf719567fef230c9386a6a5c1fb3077e63463c7f8e49a43e6b92adf202093d00
[2025-08-27T15:26:52Z DEBUG pallet_dot_client::pallet] [build_transfer_call] Destination:
[2025-08-27T15:26:52Z DEBUG pallet_dot_client::pallet] [submit_transaction] Era: period=64, phase=52
✅ What to look for
- Call bytes start with pallet
0x0aand call0x03(Balances.transfer_keep_alive). - Destination appears (SS58) and the compact-encoded amount is present in the bytes.
❌ Red flags
- Empty destination, malformed call bytes.
Runtime Pinning (Versions)
runtime version logs here
[2025-08-27T15:26:52Z DEBUG pallet_dot_client::pallet] [get_runtime_metadata] Runtime version: RuntimeVersion { spec_version: 1006002, transaction_version: 15 }
✅ What to look for
specVersionandtransactionVersionlogged (payload must match runtime).- Detect any runtime upgrade mid-flow.
Signing Context (Era, Genesis, Block Hash, Payload)
signing context logs
[2025-08-27T15:26:52Z DEBUG pallet_dot_client::pallet] [get_genesis_hash] Response: Object {"result": "0xd6eec26135305a8ad257a20d003357284c8aa03d0bdb2b357ab0a22371e11ef2"}
[2025-08-27T15:26:52Z DEBUG pallet_dot_client::pallet] [get_block_hash] Response: Object {"result": "0x898b98163e3ed953e34714833fcc48f0e604dd789d3182a19636fbbb53934658"}
[2025-08-27T15:26:52Z INFO  pallet_dot_client::pallet] [submit_transaction] Spec version: 1006002, Transaction version: 15, Genesis hash: "d6eec26135305a8ad257a20d003357284c8aa03d0bdb2b357ab0a22371e11ef2", Block hash: [137, 139, 152, 22, 62, 62, 217, 83, 227, 71, 20, 131, 63, 204, 72, 240, 230, 4, 221, 120, 157, 49, 130, 161, 150, 54, 251, 187, 83, 147, 70, 88]
[2025-08-27T15:26:52Z DEBUG pallet_dot_client::pallet] Generated hex payload: "0x0a030037d9896adf719567fef230c9386a6a5c1fb3077e63463c7f8e49a43e6b92adf202093d0045032402286bee0000b2590f000f000000d6eec26135305a8ad257a20d003357284c8aa03d0bdb2b357ab0a22371e11ef2898b98163e3ed953e34714833fcc48f0e604dd789d3182a19636fbbb5393465800"
✅ What to look for
- Mortal era printed with period and phase (ensure the window is long enough).
genesisHashand recentblockHashused in the payload.- Generated hex payload printed (reproducibility).
❌ Red flags
- Era too tight, risking Invalid Transaction: Era.
Signature & Extrinsic Build
note: signing logs here
[2025-08-27T15:26:52Z DEBUG pallet_dot_client::pallet] [submit_transaction] Signing raw payload
[2025-08-27T15:26:52Z DEBUG pallet_dot_client::pallet] [submit_transaction] Encoded MultiSignature: 0x0096a85de5e6e5fbac2c9948e73ffba10add6e3cd38385c54d5282dff9d32265fe0888800545687e6eaa052c04fe91489cf288a9f8cd5cc9cd916cb045c5b0fb06
[2025-08-27T15:26:52Z DEBUG pallet_dot_client::pallet] [build_extrinsic] Extrinsic hex: 0x4d02
[2025-08-27T15:26:52Z DEBUG pallet_dot_client::pallet] [build_extrinsic] Extrinsic hex: 0x4d02840037d9896adf719567fef230c9386a6a5c1fb3077e63463c7f8e49a43e6b92adf20096a85de5e6e5fbac2c9948e73ffba10add6e3cd38385c54d5282dff9d32265fe0888800545687e6eaa052c04fe91489cf288a9f8cd5cc9cd916cb045c5b0fb0645032402286bee00000a030037d9896adf719567fef230c9386a6a5c1fb3077e63463c7f8e49a43e6b92adf202093d00
✅ What to look for
- Signature type (e.g.,
ed25519) and encoded signature printed. - Full extrinsic hex assembled (signature + call).
Submission & Transaction Hash
note: extrinsic submission logs here
[2025-08-27T15:26:52Z DEBUG pallet_dot_client::pallet] [submit_extrinsic] Submitting extrinsic: 0x4d02840037d9896adf719567fef230c9386a6a5c1fb3077e63463c7f8e49a43e6b92adf20096a85de5e6e5fbac2c9948e73ffba10add6e3cd38385c54d5282dff9d32265fe0888800545687e6eaa052c04fe91489cf288a9f8cd5cc9cd916cb045c5b0fb0645032402286bee00000a030037d9896adf719567fef230c9386a6a5c1fb3077e63463c7f8e49a43e6b92adf202093d00
[2025-08-27T15:26:52Z DEBUG pallet_dot_client::rpc] [author_submitExtrinsic] Request: {"method":"author_submitExtrinsic","params":["0x4d02840037d9896adf719567fef230c9386a6a5c1fb3077e63463c7f8e49a43e6b92adf20096a85de5e6e5fbac2c9948e73ffba10add6e3cd38385c54d5282dff9d32265fe0888800545687e6eaa052c04fe91489cf288a9f8cd5cc9cd916cb045c5b0fb0645032402286bee00000a030037d9896adf719567fef230c9386a6a5c1fb3077e63463c7f8e49a43e6b92adf202093d00"]}
[2025-08-27T15:26:52Z DEBUG pallet_dot_client::rpc] Response: {"result":"0x1e58d3a0a3fdf08440a683b67248819a6a64c8249b486b3aae9a686e7ec8de3d"}
[2025-08-27T15:26:52Z DEBUG pallet_dot_client::pallet] [submit_extrinsic] RPC response: Object {"result": "0x1e58d3a0a3fdf08440a683b67248819a6a64c8249b486b3aae9a686e7ec8de3d"}
✅ What to look for
- RPC returns a transaction hash → extrinsic accepted into the pool.
Next step for on-chain proof
Use submitAndWatch or read System::Events at the inclusion block to capture:
balances.Transfer { from, to, amount }transactionPayment.TransactionFeePaid { who, actual_fee }system.ExtrinsicSuccess
Sidechain/Parentchain Sync (Context Only)
sidechain/parentchain sync logs
[+] Received finalized header update (2681), syncing parent chain...
[+] Found 1 block(s) to sync
[+] Found 1 event vector(s) to sync
Synced 2681 out of 2681 finalized parentchain blocks
[+] Found 0 block(s) to sync
Syncing Parentchain block number 2681 at Sidechain block number  32131
✅ What to look for
- Confirms your enclave/sidechain is syncing with the parent chain (not the transfer itself).
🛠️ ETH Transaction
This section explains how to read a TAVP-gated ETH transfer executed via the Interstellar ETH client. Each section should be replaced with the corresponding log snippet.
Chain / Sidechain Context
chain sync
2025-08-27T17:47:38.120108000Z Syncing Parentchain block number 3385 at Sidechain block number 40578
✅ What to look for
- Sidechain and parentchain blocks are syncing.
- Correct parentchain block anchored.
Transaction Initialization
transaction init logs
2025-08-27T17:47:41.206381000Z [DEBUG pallet_eth_client::pallet] initialize_transaction: START
2025-08-27T17:47:41.206930000Z [DEBUG pallet_eth_client::pallet] fetch_nonce: START
2025-08-27T17:47:41.273594000Z [DEBUG pallet_eth_client::pallet] fetch_nonce: got: 0
2025-08-27T17:47:41.273812000Z [DEBUG pallet_eth_client::pallet] fetch_latest_base_fee: got: 4335919
2025-08-27T17:47:41.361051000Z [DEBUG pallet_eth_client::pallet] fetch_max_priority_fee: got: 1003495
✅ What to look for
- ETH client pallet initializes transaction.
- Nonce fetched from RPC.
- Latest base fee and max priority fee fetched.
❌ Red flags
- Missing nonce or gas parameters.
Balance Check (Sender)
balance check logs
2025-08-27T17:47:41.434121000Z [DEBUG pallet_eth_client::pallet] balance = 50000000000000000, total_cost = 145203181993000, max_fee_per_gas = 9675333, gas_limit = 21000
✅ What to look for
- Sender’s ETH balance printed.
- Computed
total_costvs balance.
❌ Red flags
- Insufficient ETH balance for transfer + gas.
Transaction UX Message
UX message logs here
2025-08-27T17:47:41.436139000Z [DEBUG pallet_key_manager::pallet] [generate_tx_message] Generated message: Transfer 145000000000000 ETH to 0x689a1baa0268d9906e7ba915b37675f57fd2fedb
✅ What to look for
- Human-readable transfer message (amount + destination).
- Matches SCALE/RLP encoded transaction that follows.
❌ Red flags
- Message missing destination or amount.
Trusted Action Validation — Commitment
TAVP commitment logs
2025-08-27T17:47:42.459867000Z [INFO  pallet_tx_validation::pallet] [tx-validation] store_metadata_aux: who = , message_pgarbled_cid = "QmV1wJNh73iigUEFShBUD9iL7i76pDfev9vK6cWjkGdzx9", message_digits = [5, 5], pinpad_digits = [2, 3, 9, 0, 8, 5, 6, 4, 7, 1]
2025-08-27T17:47:42.460099000Z [INFO  pallet_key_manager::pallet] [ETH-client]-[key-manager]- Commitment prepared and stored: cid="QmV1wJNh73iigUEFShBUD9iL7i76pDfev9vK6cWjkGdzx9"
✅ What to look for
store_metadata_auxshows valid CID, digits, and pinpad permutation.- Key-manager confirms commitment stored.
❌ Red flags
- Missing CID or digits; commit not stored.
Trusted Action Validation — Input Check
TAVP input check logs
2025-08-27T17:47:51.181678000Z [INFO  pallet_tx_validation::pallet] [tx-validation] check_input: who = , ipfs_cid = "QmV1wJNh73iigUEFShBUD9iL7i76pDfev9vK6cWjkGdzx9", input_digits = [5, 5]
2025-08-27T17:47:51.181794000Z [INFO  pallet_tx_validation::pallet] [tx-validation] check_input: computed_inputs_from_permutation = [5, 5], message_digits = BoundedVec([5, 5], 10)
2025-08-27T17:47:51.181911000Z [INFO  pallet_tx_validation::pallet] [tx-validation] TxPass
✅ What to look for
computed_inputs_from_permutationmatchesmessage_digits.TxPasslogged.
❌ Red flags
TxFailor mismatch.
Transaction Build & Signing
transaction build logs
2025-08-27T17:47:41.434614000Z [DEBUG pallet_eth_client::pallet] create_eip1559_signed_rlp: START
✅ What to look for
- EIP-1559 RLP signed transaction created.
- Prepared raw transaction before submission.
Submission & Transaction Hash
submission logs
2025-08-27T17:47:51.688736000Z [DEBUG pallet_eth_client::pallet] send_raw_transaction: response_body = {...}
2025-08-27T17:47:51.688957000Z [INFO  pallet_eth_client::pallet] send_transaction: OK: 0x6593fb0b75fb4eae41e6d918f1ab99dd011f4b1e95c6d913b607968d7f6a0471
✅ What to look for
send_raw_transactionRPC response includes tx hash.- Client logs
send_transaction: OK: 0x...
❌ Red flags
- RPC error or missing hash.
Parentchain Inclusion / Sync
parentchain sync logs
2025-08-27T17:48:01.199764000Z [+] Received finalized header update (3387), syncing parent chain...
2025-08-27T17:48:01.245818000Z [+] Found 1 event vector(s) to sync
✅ What to look for
- Parentchain finalized headers advancing.
- Confirm block containing transaction is synced.
🛠️ SOL Transaction
This section explains how to read a TAVP-gated SOL transfer executed via the Interstellar SOL client. Each section should be replaced with the corresponding log snippet.
Balance Check (Sender)
balance check logs
2025-08-27T18:38:38.146384000Z [DEBUG pallet_sol_client::rpc] [send_request] Received response for method getBalance: {"result":{"context":{"apiVersion":"2.3.6","slot":354059343},"value":100000000}}
2025-08-27T18:38:38.146741000Z [INFO  pallet_sol_client::pallet] [get_balance_account_str] Balance fetched for account 4m1pDLuwmxzTYdxbVFJNEp9g1sXRZN2MJUK4XEDpB42D: 100000000
✅ What to look for
- RPC
getBalanceresponse with correct slot and balance. - Balance printed for the account.
❌ Red flags
- Missing or zero balance when transfer expected.
Transaction UX Message
UX message loggs
2025-08-27T18:38:38.146931000Z [DEBUG pallet_key_manager::pallet] [generate_tx_message] Generated message: Transfer 12300000 SOL to CTB18qngXLsqujuG4SGkZBr2xhg6Ndatki1ebjAUGAqC
✅ What to look for
- Human-readable transfer message (amount + destination).
- Matches encoded transaction data that follows.
❌ Red flags
- Missing destination or mismatched amount.
Trusted Action Validation — Commitment
TAVP commitment logs
2025-08-27T18:38:39.139427000Z [INFO  pallet_tx_validation::pallet] [tx-validation] store_metadata_aux: message_pgarbled_cid = "QmZqyBqKvTYbM5RVwxWAZBGwrfKUeKxuKANoP1bJhMx9Uo", message_digits = [9, 7], pinpad_digits = [9, 7, 4, 6, 3, 0, 8, 2, 1, 5]
2025-08-27T18:38:39.140108000Z [INFO  pallet_key_manager::pallet] [SOL-client]-[key-manager]- Commitment prepared and stored: cid="QmZqyBqKvTYbM5RVwxWAZBGwrfKUeKxuKANoP1bJhMx9Uo"
✅ What to look for
store_metadata_auxshows CID, message_digits, and pinpad digits.- Key-manager confirms commitment stored (CID, digits, permutation).
❌ Red flags
- Commitment missing or malformed.
Trusted Action Validation — Input Check
TAVP input check logs
2025-08-27T18:38:48.179536000Z [INFO  pallet_tx_validation::pallet] [tx-validation] check_input: ipfs_cid = "QmZqyBqKvTYbM5RVwxWAZBGwrfKUeKxuKANoP1bJhMx9Uo", input_digits = [0, 1]
2025-08-27T18:38:48.179681000Z [INFO  pallet_tx_validation::pallet] [tx-validation] check_input: computed_inputs_from_permutation = [9, 7], message_digits = BoundedVec([9, 7], 10)
2025-08-27T18:38:48.179744000Z [INFO  pallet_tx_validation::pallet] [tx-validation] TxPass
✅ What to look for
computed_inputs_from_permutationmatchesmessage_digits.TxPasslogged.
❌ Red flags
TxFailor mismatch.
Blockhash & Transaction Simulation
blockhash + simulation logs
2025-08-27T18:38:48.254095000Z [DEBUG pallet_sol_client::rpc] [send_request] Received response for method getLatestBlockhash: {"blockhash":"FZGNbhT3ij4g7NRNsUuoQTzSuzdV3JxZnxG7P4pSBqUB","lastValidBlockHeight":309803450}
2025-08-27T18:38:49.212380000Z [DEBUG pallet_sol_client::rpc] [send_request] Received response for method simulateTransaction: {"result":{"value":{"err":null,"logs":["Program 11111111111111111111111111111111 invoke [1]","Program 11111111111111111111111111111111 success"],"unitsConsumed":150}}}
2025-08-27T18:38:49.213005000Z [INFO  pallet_sol_client::pallet] [simulate_transaction] Transaction simulation successful
✅ What to look for
getLatestBlockhashreturns valid blockhash + lastValidBlockHeight.simulateTransactionRPC succeeds with no error.- Program logs indicate success.
❌ Red flags
- Blockhash invalid or simulation returns error.
Transaction Submission & Signature
transaction submission logs
2025-08-27T18:38:52.145311000Z [DEBUG pallet_sol_client::rpc] [send_request] Received response for method sendTransaction: {"result":"3QuGubLdzpSi6M3Xy2VxW5ZNJZPnxwy8MfRfvKurDA3MyNYMvgKFVPXt16xzDiHbbn4Px6hfYiq6t7haA6MdbdAb"}
2025-08-27T18:38:52.145987000Z [INFO  pallet_sol_client::pallet] [send_transaction] Transaction sent with signature: 3QuGubLdzpSi6M3Xy2VxW5ZNJZPnxwy8MfRfvKurDA3MyNYMvgKFVPXt16xzDiHbbn4Px6hfYiq6t7haA6MdbdAb
✅ What to look for
sendTransactionRPC returns a signature (base58).- Client logs transaction signature and blockhash.
❌ Red flags
- RPC error or missing signature.
Parentchain Inclusion / Sync
parentchain sync logs
2025-08-27T18:38:49.334912000Z [+] Received finalized header update (3641), syncing parent chain...
2025-08-27T18:39:01.341838000Z [+] Received finalized header update (3642), syncing parent chain...
2025-08-27T18:39:01.387644000Z [+] Found 1 event vector(s) to sync
✅ What to look for
- Finalized headers advance.
- Event vectors found
🛠️ BTC Transaction
This section explains how to read a TAVP-gated BTC transfer executed via the Interstellar BTC client. Each section should be replaced with the corresponding log snippet.
Transaction Initialization
init logs
2025-08-29T14:26:35.231345000Z [DEBUG pallet_btc_client::pallet] initialize_transaction: START
2025-08-29T14:26:35.231675000Z [DEBUG pallet_btc_client::pallet] Address validation successful: tb1qhc43vxwmfe4r7a94mwgaef2ukwk4nhec52f4xq
✅ What to look for
- Transaction initialization starts.
- Recipient address validated.
- UTXO availability checked.
❌ Red flags
- Invalid recipient address.
- No UTXOs available.
UTXO Fetch & Balance Validation
utxo logs
2025-08-29T14:26:39.971161000Z [DEBUG pallet_btc_client::pallet] parse_utxos_from_response: parsed UTXO 0: txid=53acf714cc3b2f1cad53d66c1b4c6b1bd3ff7a22381ee73c463855bf3f5e5668, vout=1, amount=500000 sats
2025-08-29T14:26:39.971393000Z [INFO  pallet_btc_client::pallet] parse_utxos_from_response: SUCCESS: parsed 1 UTXOs, total_value=500000 sats
2025-08-29T14:26:39.972834000Z [INFO  pallet_btc_client::pallet] UTXO check passed: available=500000 sats, needed=16500 sats (amount=14500 + fee=2000)
✅ What to look for
- UTXOs fetched and parsed.
- Total available value printed.
- Required amount + fee compared with available balance.
❌ Red flags
- Empty UTXO set.
- Insufficient value to cover amount + fees.
Transaction UX Message
UX message
2025-08-29T14:26:39.973713000Z [DEBUG pallet_key_manager::pallet] [generate_tx_message] Generated message: Transfer 14500 BTC to tb1qhc43vxwmfe4r7a94mwgaef2ukwk4nhec52f4xq
✅ What to look for
- Human-readable message with sats amount and destination address.
❌ Red flags
- Missing destination or mismatched amount.
Trusted Action Validation — Commitment
TAVP commitment logs here
2025-08-29T14:26:40.982106000Z [INFO  pallet_tx_validation::pallet] [tx-validation] store_metadata_aux: message_pgarbled_cid = "QmQby4a7R7a38Rp4CMPv8H4ggcf9Mxgx2eog4jJhteQBuK", message_digits = [9, 3], pinpad_digits = [2, 1, 7, 8, 0, 9, 3, 6, 4, 5]
2025-08-29T14:26:40.982332000Z [INFO  pallet_key_manager::pallet] [BTC-client]-[key-manager]- Commitment prepared and stored: cid="QmQby4a7R7a38Rp4CMPv8H4ggcf9Mxgx2eog4jJhteQBuK"
✅ What to look for
- Commitment CID, message digits, and pinpad digits printed.
- Key-manager confirms storage of commitment.
❌ Red flags
- Missing CID or digits; commit not stored.
Trusted Action Validation — Input Check
TAVP input check logs
2025-08-29T14:26:59.128916000Z [INFO  pallet_tx_validation::pallet] [tx-validation] check_input: ipfs_cid = "QmQby4a7R7a38Rp4CMPv8H4ggcf9Mxgx2eog4jJhteQBuK", input_digits = [5, 6]
2025-08-29T14:26:59.129025000Z [INFO  pallet_tx_validation::pallet] [tx-validation] check_input: computed_inputs_from_permutation = [9, 3], message_digits = BoundedVec([9, 3], 10)
2025-08-29T14:26:59.129074000Z [INFO  pallet_tx_validation::pallet] [tx-validation] TxPass
✅ What to look for
- Input digits checked against stored commitment.
TxPassconfirmation.
❌ Red flags
TxFailor mismatch between digits.
Transaction Construction & Signing
signing logs
2025-08-29T14:27:03.918425000Z [INFO  pallet-btc-client] Unsigned transaction created: inputs=1, outputs=2, total_input_value=500000 sats
2025-08-29T14:27:03.918599000Z [INFO  pallet_btc_client::pallet] Signing input 0: 53acf714cc3b2f1cad53d66c1b4c6b1bd3ff7a22381ee73c463855bf3f5e5668:1, amount=500000 sats
2025-08-29T14:27:03.918989000Z [DEBUG pallet_btc_client::pallet] Successfully converted to Bitcoin DER signature: 71 bytes
2025-08-29T14:27:03.919129000Z [DEBUG pallet_btc_client::pallet] Transaction signing completed: 1 inputs signed
✅ What to look for
- UTXO selection and change calculation.
- Unsigned transaction created with correct inputs/outputs.
- Transaction signed (DER signatures produced).
❌ Red flags
- Incorrect change computation.
- Signing errors.
Transaction Broadcast & Hash
broadcast logs
2025-08-29T14:27:03.919469000Z [DEBUG pallet_btc_client::pallet] RPC request: method=sendrawtransaction, params=[0200000000010168565e3f...]
2025-08-29T14:27:03.981372000Z [DEBUG pallet_btc_client::pallet] Transaction broadcast successful: txid=60e95abf0d674143fae1ef11f115386a6dadcb4438ee0ab5c1a4e26438844878
✅ What to look for
sendrawtransactionRPC called.- Transaction successfully broadcast with txid.
❌ Red flags
- RPC error or missing txid.
Parentchain Inclusion / Sync
parentchain sync logs
2025-08-29T14:26:37.130937000Z [+] Received finalized header update (855), syncing parent chain...
2025-08-29T14:27:01.151365000Z [+] Received finalized header update (857), syncing parent chain...
✅ What to look for
- Parentchain finalized headers advancing.
- Event vectors synced.
Optional: Front-End Access
You can inspect chain state and transactions via:
- Polkadot.js Apps
- Or your preferred Substrate front-end UI
Notes
- All services run in Docker containers and use local ports
9944,2090, and5001 - This setup replicates the same runtime environment used in hosted testnets but fully self-contained
- Ideal for offline testing, developer evaluation, or deeper inspection of runtime logs
Recovery was introduced in M1 and remains part of the overall testnet scope. All subsequent milestones are designed to remain compatible with the recovery flow, but in M2 we are not re-testing or refining recovery.
The focus of M2 is backend transaction generation and execution. Recovery will be revisited in future milestones (notably M4) and fully integrated with the SDK delivery, where its stability and developer usability can be validated in a realistic context.
This avoids redundant effort at this stage, while ensuring continuity from M1 to later milestones.
This Android application is provided as a technical demonstration of Interstellar’s secure Web3 account infrastructure. It serves as a foundation for the forthcoming Android and iOS SDKs, which are still under active development.
Please note that the current user interface and experience are not representative of the final product. Both UI and UX will be significantly refined to align with Interstellar’s core mission: delivering the highest levels of simplicity and security in mobile self-custody.
If you've jumped straight into the evaluation, we recommend consulting the Milestone 1 documentation for key context. It outlines the core architecture, backend logic, and trusted execution flows implemented in this milestone.
The documentation is modular—feel free to explore only the sections most relevant to your review or interest.
You can also use the search bar (top right corner) to locate specific topics quickly. Helpful keywords include:
VHDL,circuits,garbled,TEE,integritee,SE attestationNFC,VCA,recovery,threshold,trusted UXcomparison,passkey,ledger,authentication,compliance,security,ATT&CK